
Photo evidence
On this page:
Practical guide to photo evidence
This tip sheet aims to assist applicants in meeting the visual evidence required when applying for funding under the Disaster Recovery Funding Arrangements (DRFA): Reconstruction of Essential Public Assets (REPA), Emergency Works (EWK) and Immediate Reconstruction Works (IRW).
Under the Commonwealth DRFA, eligibility for funding to repair or reconstruct eligible assets damaged by an activated disaster hinges on an applicants’ ability to provide visual evidence, such as photos that demonstrate:
- the pre-disaster and post-disaster condition of the asset, linking the claimed damage to the eligible disaster
- the post-disaster condition of the asset, including the exact location, nature and extent of event damage to the eligible asset and claimed reconstruction works
- the proposed or completed works are in line with the pre-disaster function of the asset and
- the claimed IRW or REPA approved scope of works was fully completed.
Quality, well managed, JPEG photos that include EXIF metadata, GPS coordinates and time/date taken are the most effective way to support each event damage site and each damaged component of eligible assets, and the scope of reconstruction works.
How many photos? Photos need to be sufficient to demonstrate the:
- exact location, nature and extent of event damage to the eligible asset damage sites and each damaged component
- pre and post disaster condition of the asset demonstrating new damage to the asset is caused as a direct result of the event
- proposed scope of works - treatments and quantities required to reconstruct the event damage to the asset components and
- claimed scope of works is in line with asset pre-disaster function.
Metadata? Ensure photos are geotagged with GPS coordinates/metadata, and saved as JPEGs.
Timeframes? Ensure visual, geotagged photos and other evidence is collected within the eligible timeframes.
- REPA and IRW: pre-disaster condition evidence DRFA eligible timeframes
- Local governments – latest available evidence but no older than four years before the event.
- State agencies - latest available evidence but no older than two years before the event.
- REPA: post disaster evidence DRFA eligible timeframes collected as soon as practicable following the event, but must be collected no later than 12 months after the event.
- REPA: completion photo timeframes –taken as soon as practicable after works are completed demonstrating the completed approved works, ready to be lodged with the close out submission.
- IRW: post disaster evidence eligible timeframes –collected as soon as practicable following the event and must be collected prior to undertaking EWK or IRW works, supporting exact locations, nature and extent of event damage to assets and the scope of works
- IRW: completion photo evidence timeframes –taken as soon as practicable after works are completed demonstrating the claimed completed scope of works.
- EWK: post event damage photo timeframes - taken during and after the event and prior to or while undertaking EWK, sufficient to demonstrate impact of the event on eligible assets and the need for the claimed emergency works,
Checklists
Preparing for damage photo and data pick up
- Tools: straight-edges, wedge measures, tape measures, rulers, spray paint, chainage wheels are on hand ready for use in evidencing damage locations, dimensions and supporting scope
- Camera – use a GPS-enabled camera/device to capture the metadata and exact location of event damage to assets
- Camera settings – IMPORTANT Check:
- resolution is set to medium/high
- GPS is on and reporting the correct location
- date and time are correct
- photo direction/orientation functionality is enabled
- Battery –ensure battery is fully charged, and back up charger is charged and packed, or back up batteries are packed
- Memory / memory card –card / storage space is available, phone/camera memory /spare memory card are available
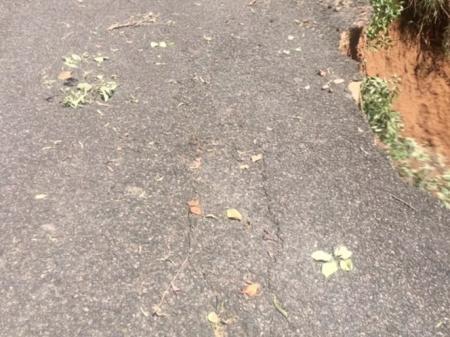
- Best time of day – early morning and late afternoon provide optimum contrast to capture damage to road surfaces –watch out for glare or dark shadows from trees
- Angle of photos – position yourself down low where required to capture distinctive damage features e.g. pavement deformation or washouts, or blocked or damaged culverts and pipes, and support the proposed scope and quantities
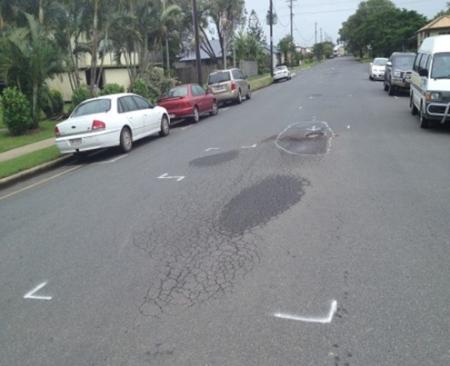
- Highlight damage – where damage is hard to see. For example use spray paint to highlight the nature and extent of event damage and support the proposed length, depth and width of reconstruction works
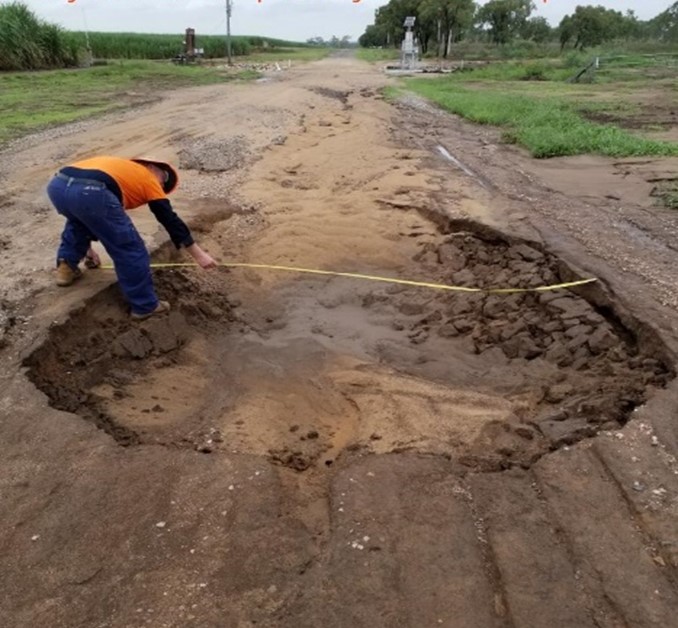
- Capture dimensions – use a ruler/tape measure /straight edge to demonstrate depth/width/distance, and for large damage sites consider using a vehicle or scalable feature to demonstrate size and scale
- Take photos sequentially, at set intervals in one direction along road asset chainages where consistent event damage has occurred, to demonstrate the nature and extent of damage and the proposed scope of works
- Stop and take close-up photos where required to highlight event-related damage, function of the asset and all damaged asset components. E.g. transport or stormwater infrastructure components: pipes, culverts, headwalls scope
- Use levels or ruler/tape measures/straight edges to support dimensions of depressions, sinkholes and orientation at the chainage and enable assessment of the event damage to the asset and proposed treatments and quantities
Photos of completed works
- Ensure completion photos include metadata and GPS coordinates map to the approved line item scope and sufficiently demonstrate completed treatments and extent of completed works in line with approved scope.
- Take completion photos sequentially along the completed works, where possible in the same direction as post event damage photos.
- Ensure completion photos demonstrate the extent of completed approved works on assets and components.
- Ensure photos are taken as soon as practicable after works are completed
- Ensure photos are captured and managed as JPEG files
Note: Completion and inspection photos may also be used as additional evidence if required to demonstrate asset condition should an asset be damaged by a subsequent event.
Saving and managing photos
The Management and Reporting System (MARS) portal enables applicants to bulk upload photos into submissions. To prepare for uploading to MARS, it is recommended that photos be saved in folders, by asset using descriptive file names, e.g. asset name and chainage. It is also important to use clear file references and always back up files.
MARS photo evidence
Preparing to upload photos to MARS:
- Ensure photos are JPEG format with embedded metadata
- Ensure each photo has a unique name
- Ensure each photo file name is no more than 100 characters
- REPA and IRW submissions Refer to the MARS Portal bulk photo upload
- EWK submissions: Ensure unique photo file references have been entered into the relevant Excel submission form photo fields ready for bulk upload - names are entered in the following format: name.jpeg|name1.jpeg|name2.jpeg|
A photo conversion script can also be requested via your Regional Liaison Officer (if required).
Other supporting evidence
Supporting evidence, other than photos, may also be lodged:
- pre-disaster condition evidence including geospatial data, videos, maintenance records or asset registers
- post disaster evidence such as geospatial data, satellite images or asset inspection reports.
Photo examples and tips
[BELOW IS UNDER DEVELOPMENT - THANK YOU FOR YOUR PATIENCE]
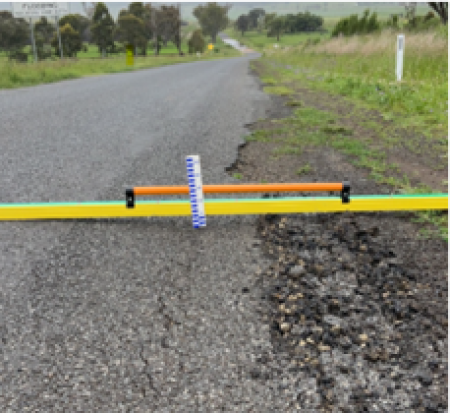
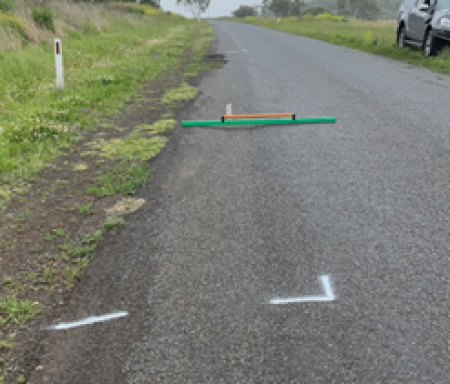
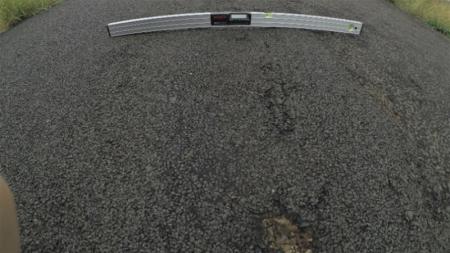
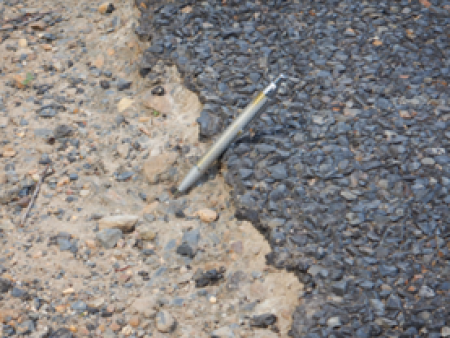
Use a straight edge, tape or ruler
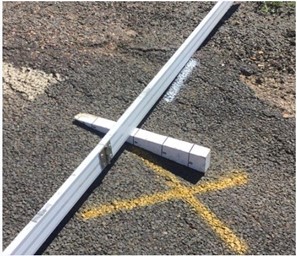
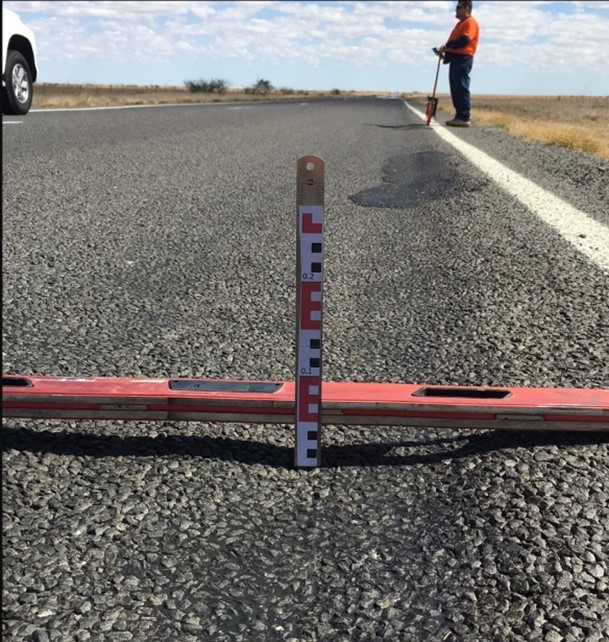
Use a straight edge / rule to demonstrate subsidence, shoving, sinkholes or scours to the asset caused by the event and to support proposed treatment and quantities. Where possible capture full length of the straight edge, and separate close up/s of the depth.
| 
|
| 
|
| 
|
| 
| |
| 
| |
| Using asset mark-up, straight edge and measures to support extent of damage at the site incl depth, width and length | ||

| 
| |
| 
| |
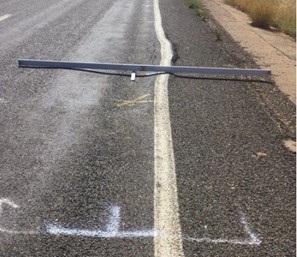
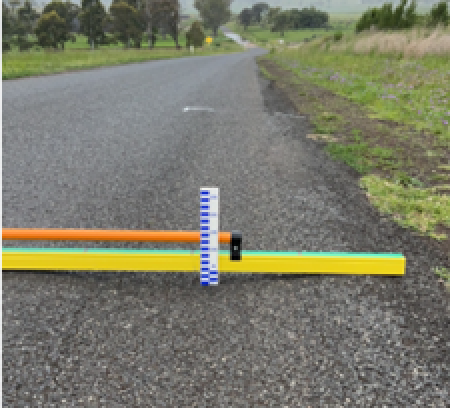
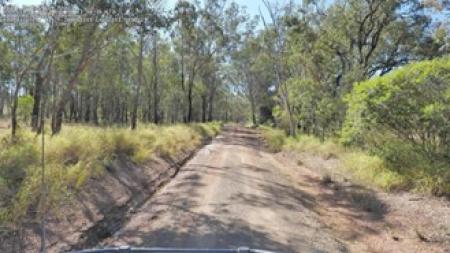
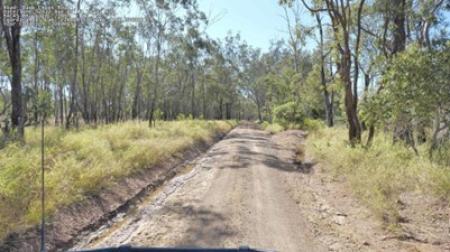
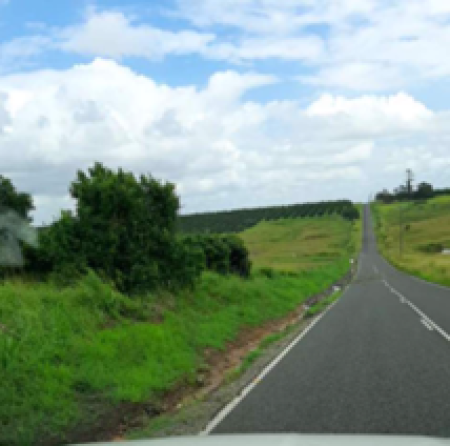
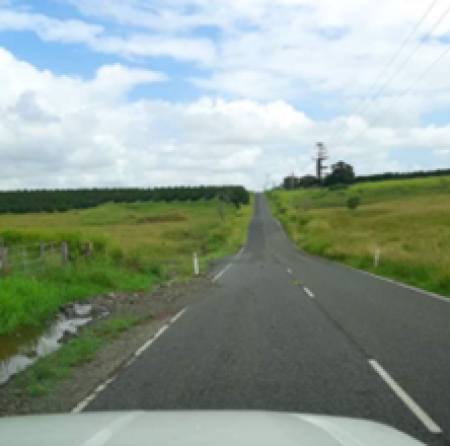
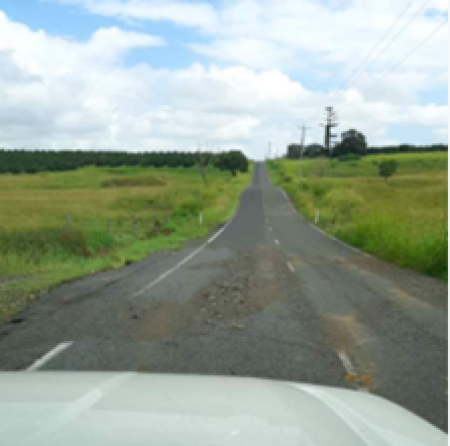
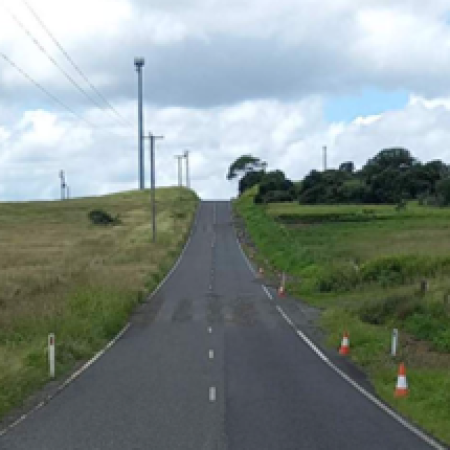
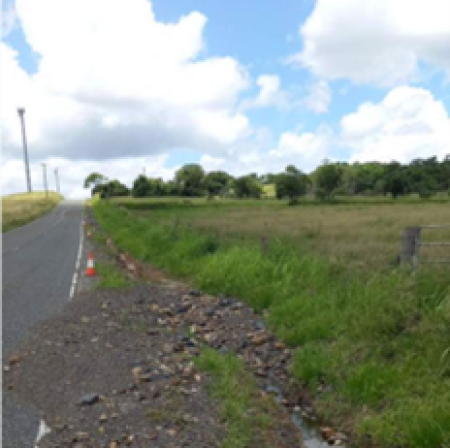
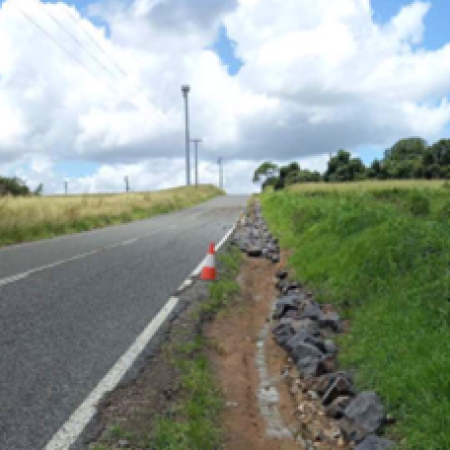
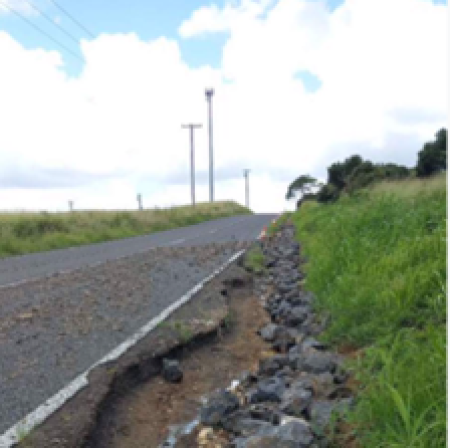
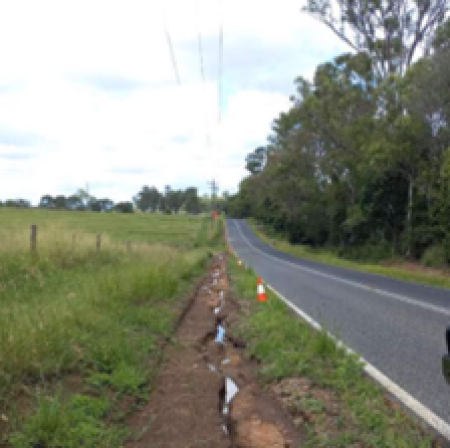
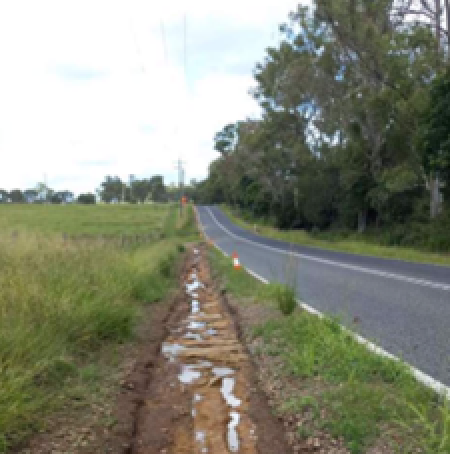
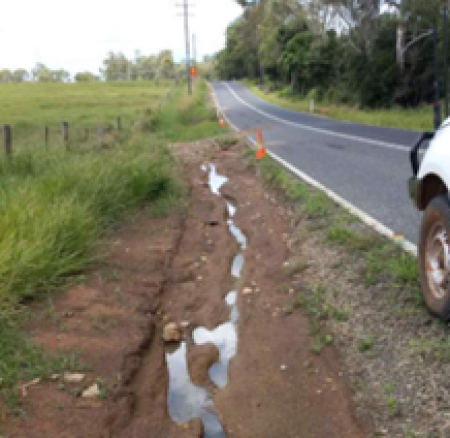
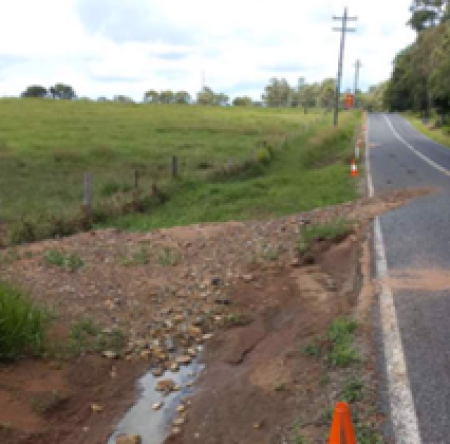
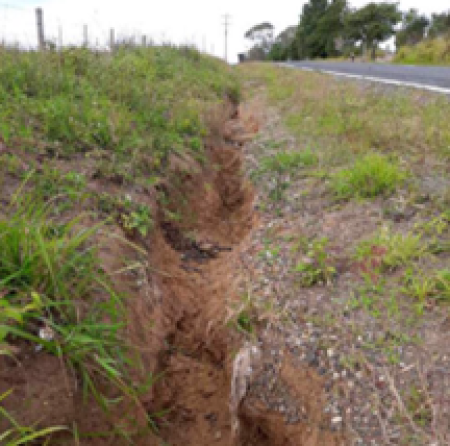
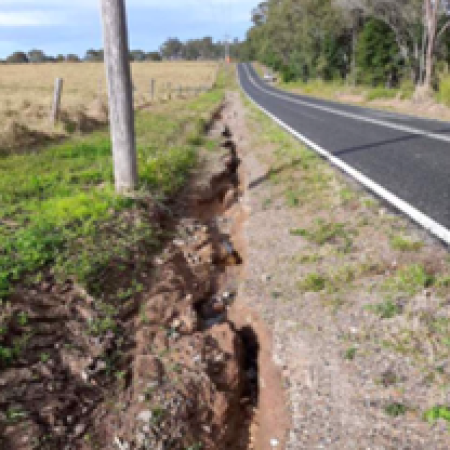
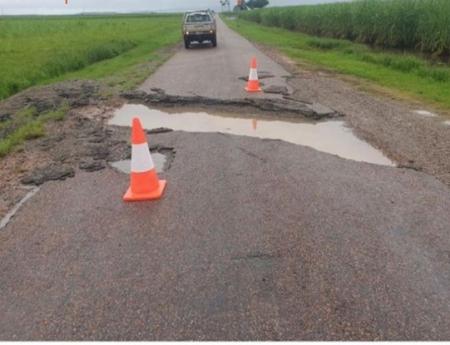
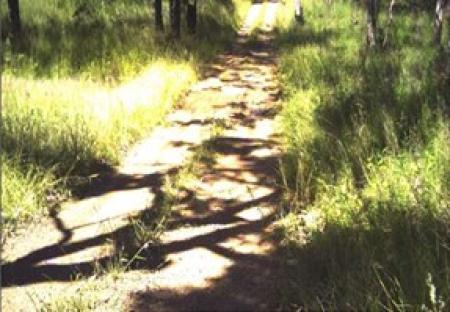
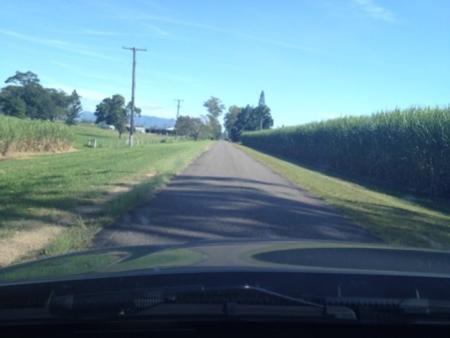
| Capture consecutive, evenly distanced post event photos to clearly demonstrate the full extent of damage caused by the event as well as the full length of each treatment and quantity required to restore asset to pre-disaster function. | ||

| 
| 
|
| Consistently spaced photographs along the asset demonstrating event damage at regular intervals in the same direction | ||
| 
| 
|
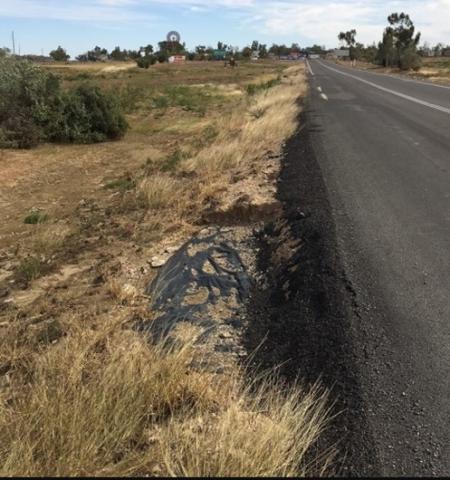
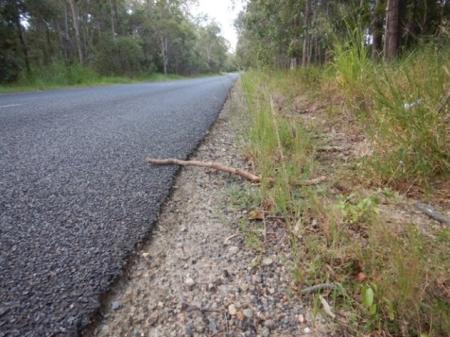
Series of sequential post event photos, captured at regular intervals demonstrating the continuous extent of the shoulder scour damage to the asset. Photos taken from vehicle, as well as close up demonstrating depth of scours & quantities.
| 
| 
|
| 
| 
|
| 
| 
|
| 
| 
|
| 
| 
|
| 
|
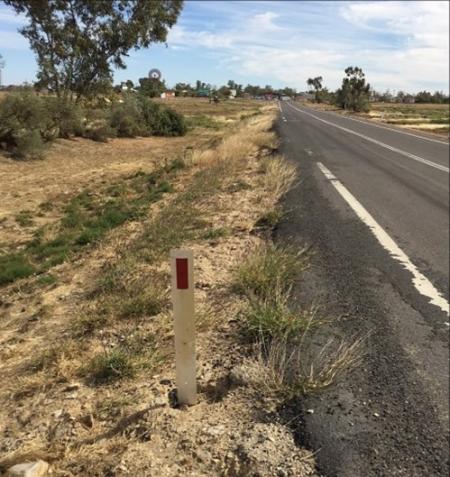
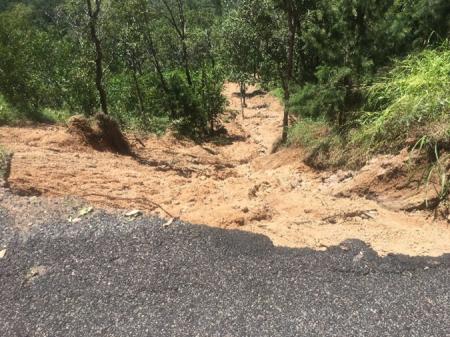
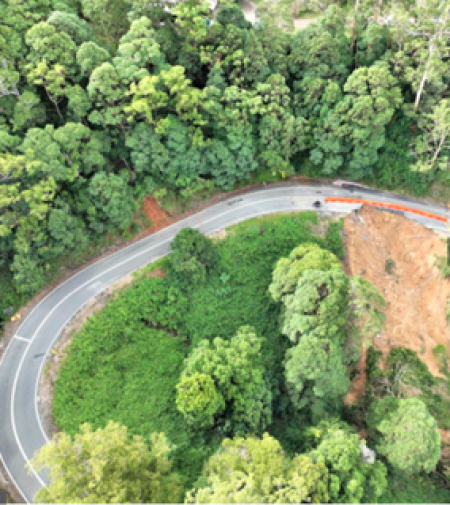
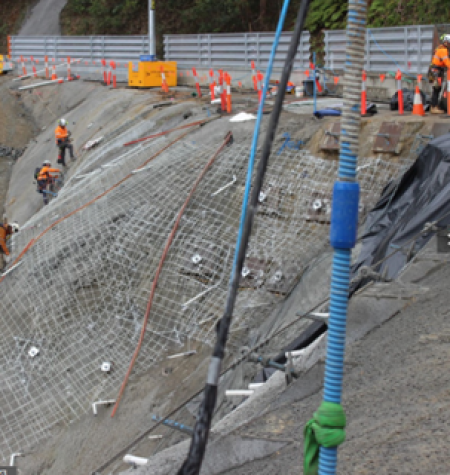
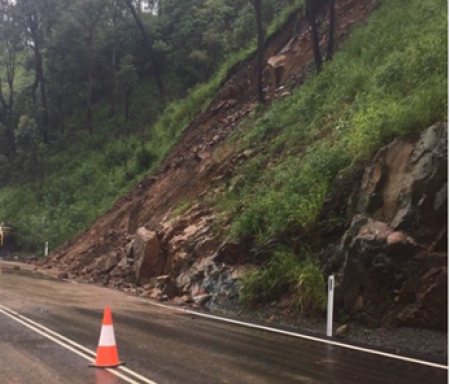
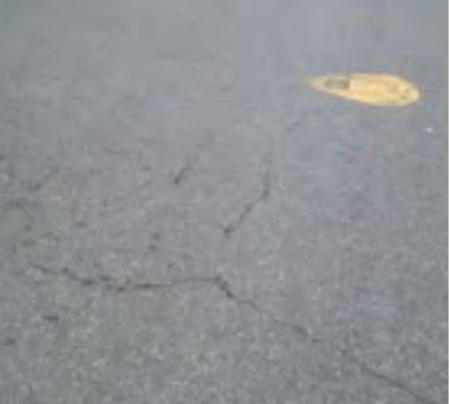
Below is an example of a selection of photos demonstrating pre and post disaster condition of the asset, the location, nature and extent of damage to the asset and components and the proposed treatments and quantities.
| 
|
| 
|
| 
|
|
| 
|

| 
|
| 
|
| 
|
| 
|
| 
|
| |
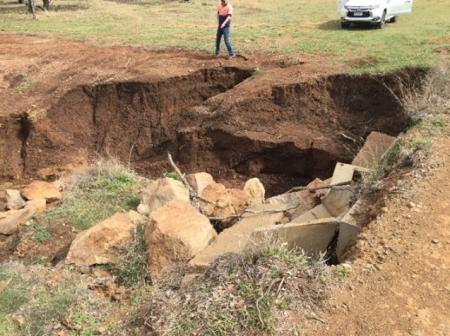
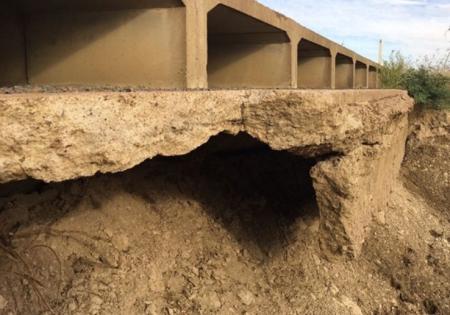
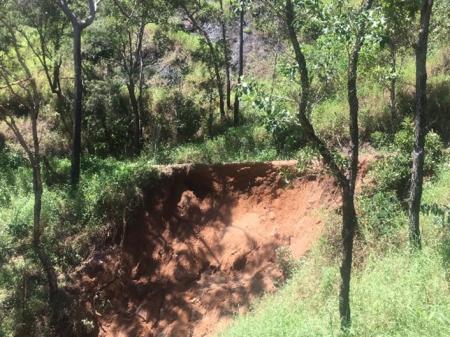
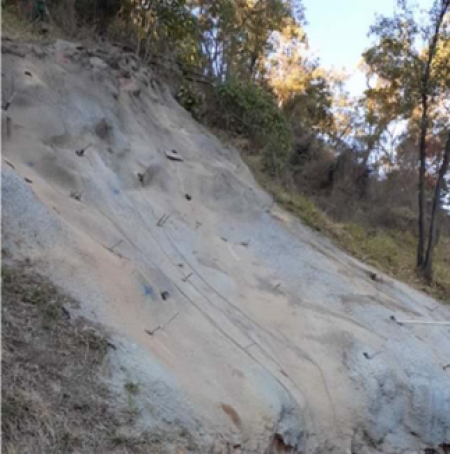
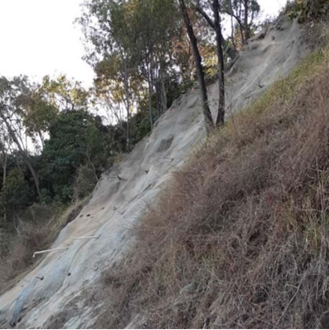
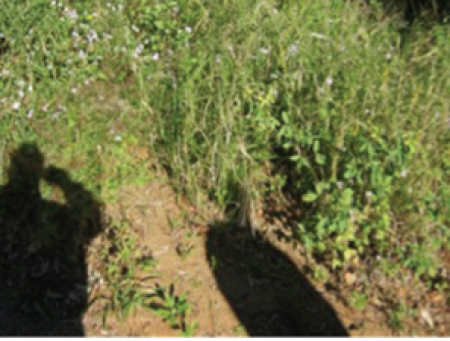
Ensure photos show the context of slip and the location, nature and extent of impact on the eligible asset. Scope may be supported by a geotechnical report.

| 
| 
|
| 
| 
|

| 
| 
|
|
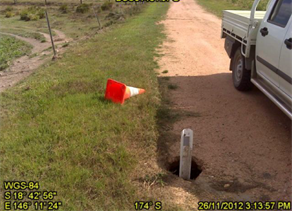
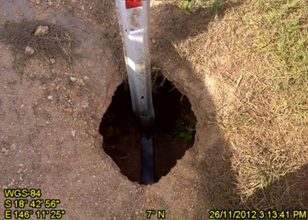
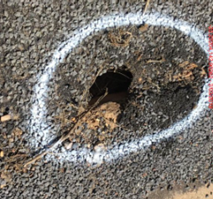
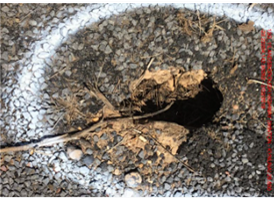
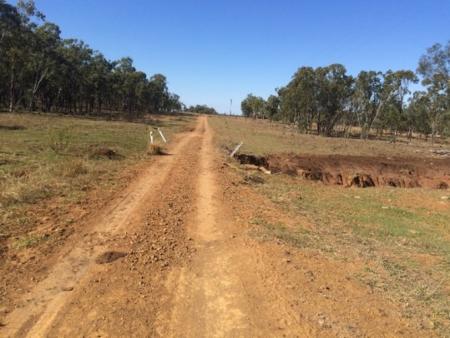
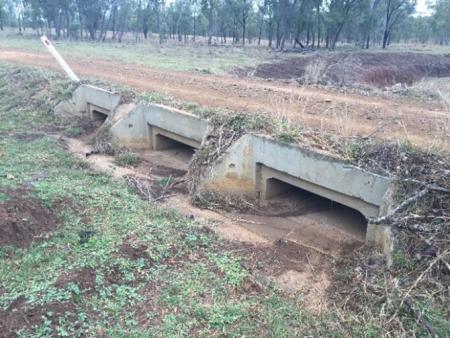
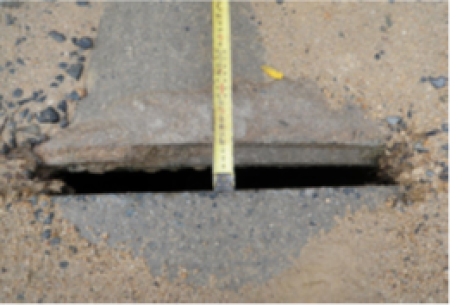
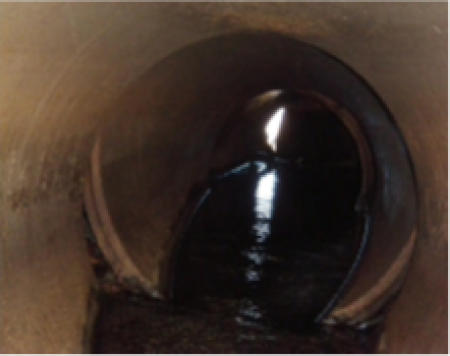
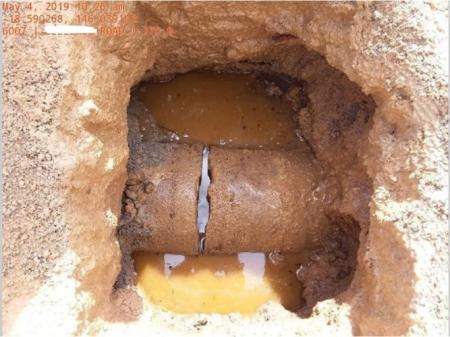
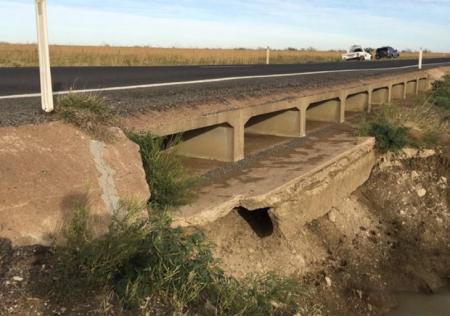
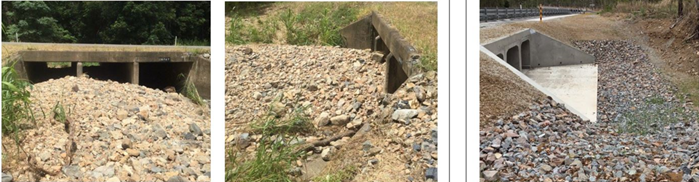
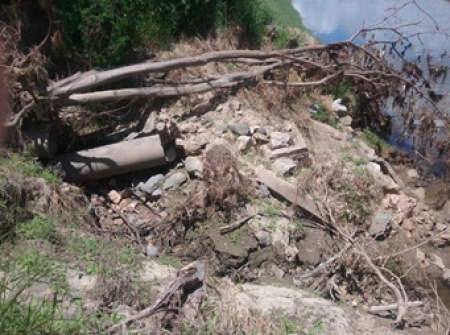
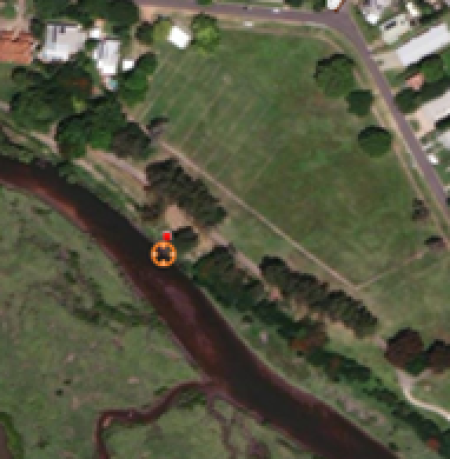
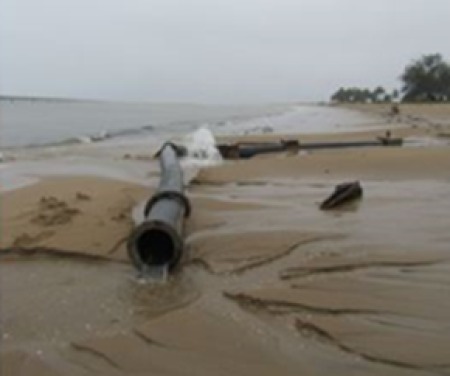
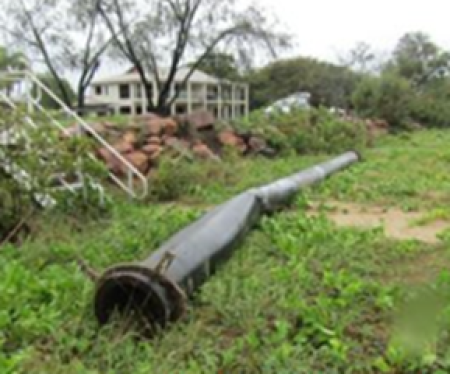
Below is a sequence of photos demonstrating post event condition of a stormwater asset components, the location, nature and extent of event damage to support the proposed scope of works.
| 
|
| 
|
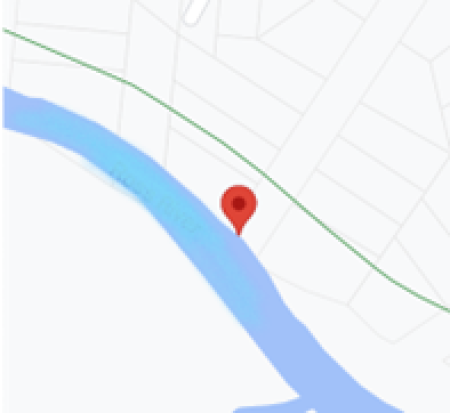
| Above: geotagged photos demonstrating location of the stormwater infrastructure mapped in MARS | |
| 
|
| |
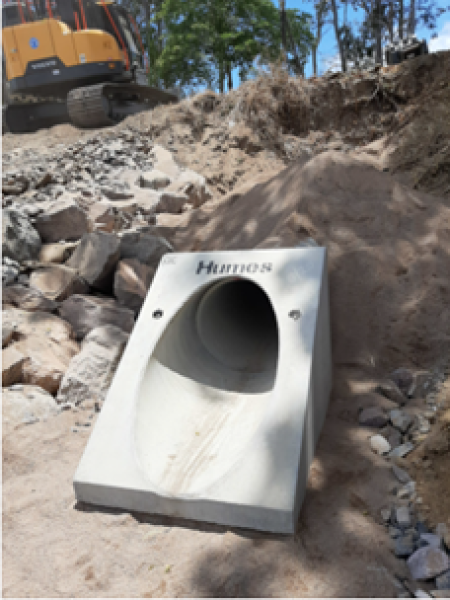
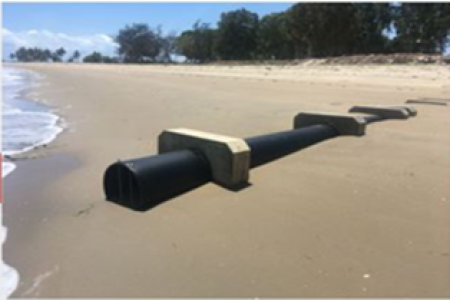
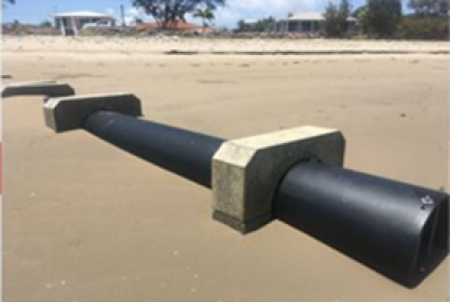
| Above –geotagged photos demonstrating the completed approved scope of works (for close out) | |
| 
|
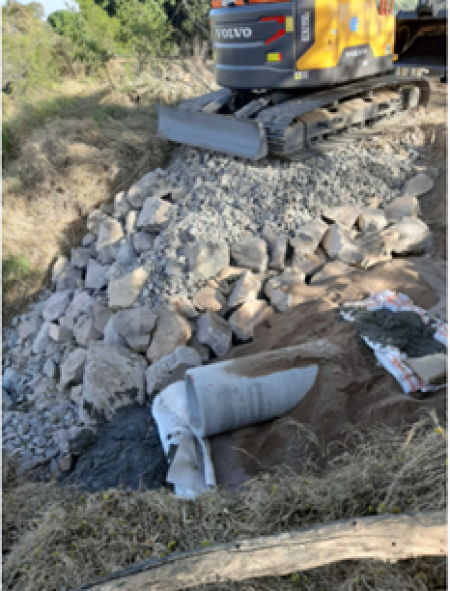
| Above - post event photos demonstrating location, nature and extent of event damage to stormwater infrastructure | |
| 
|
| Above – geotagged photos demonstrating the completed approved scope of works (for close out) | |
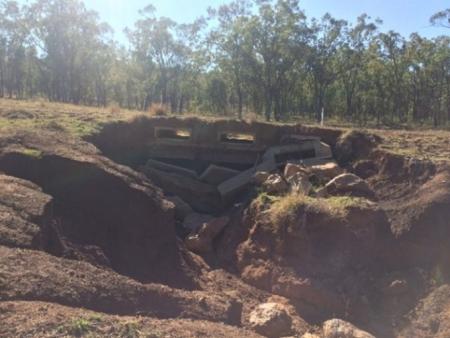
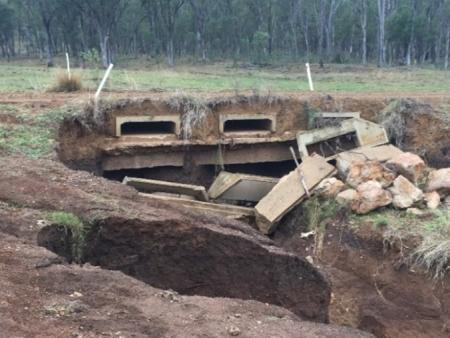
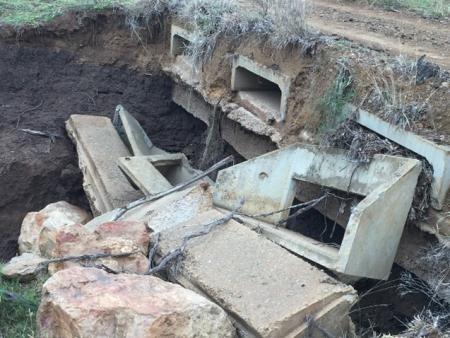
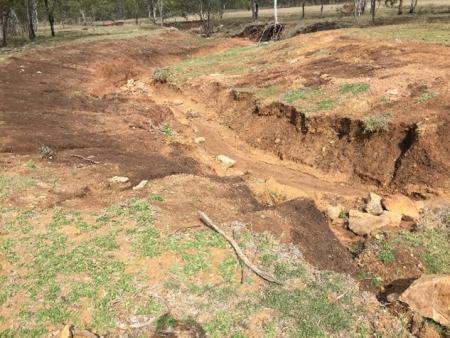
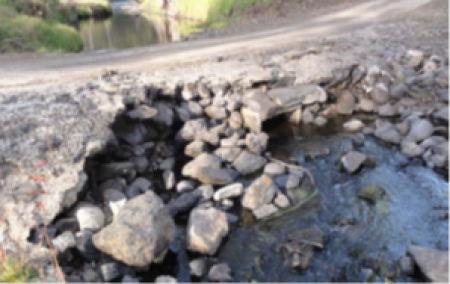
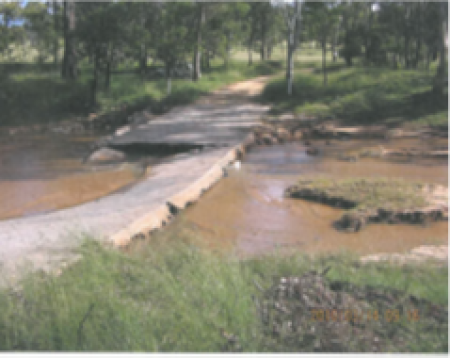
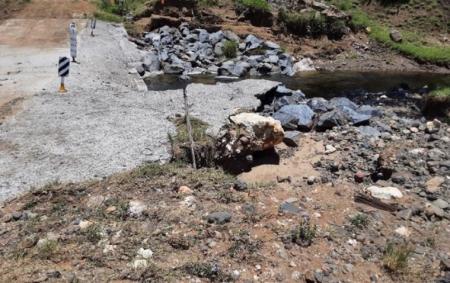
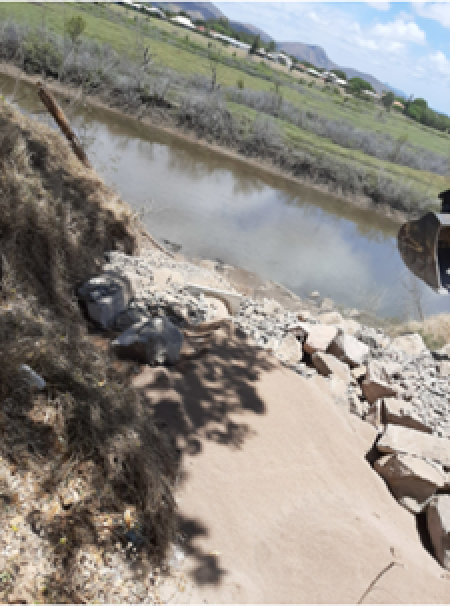
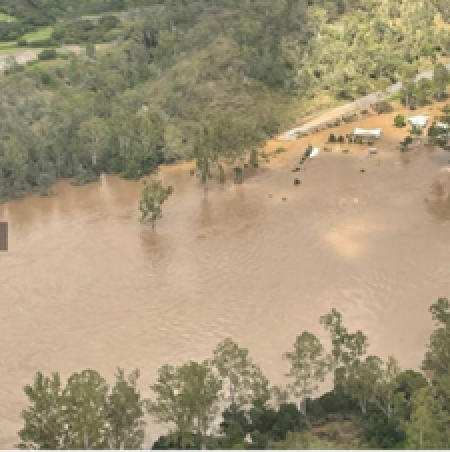
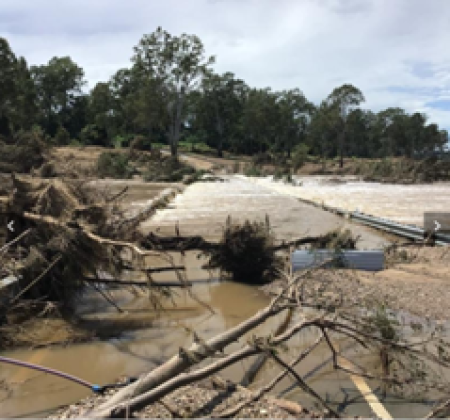
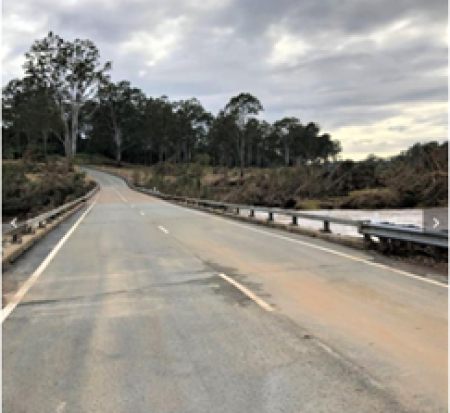
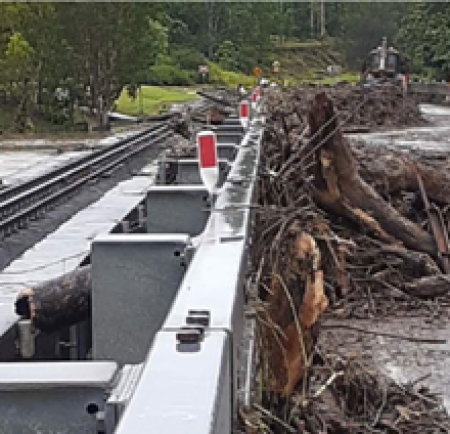
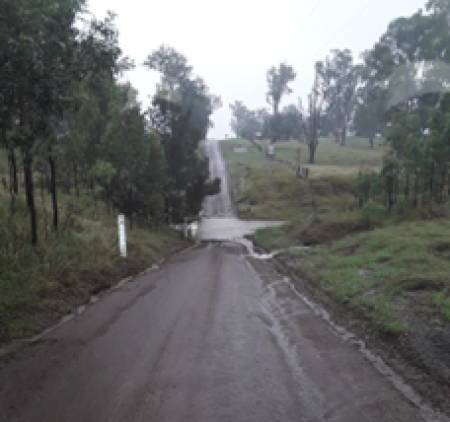
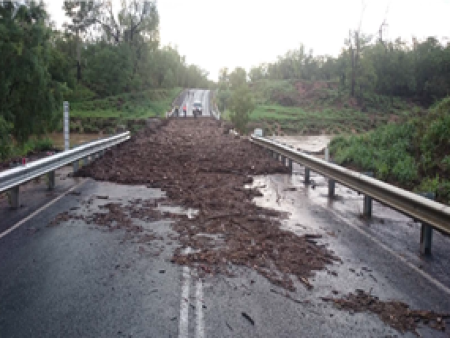
Below are three photos supporting Emergency Works on a crossing.
| 
| 
|
| 
| 
|
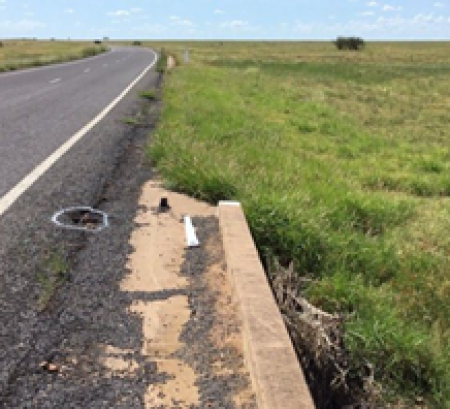
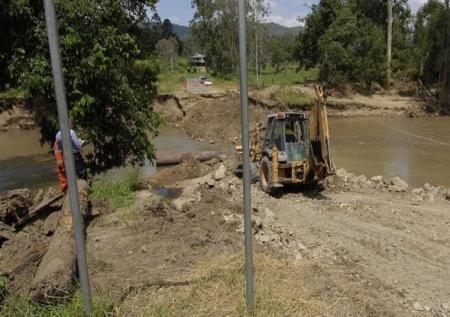
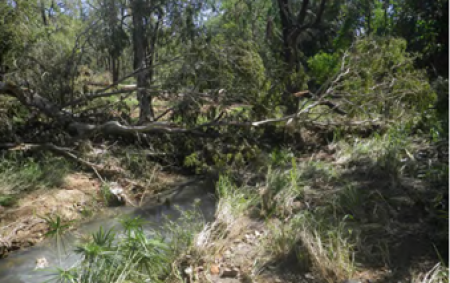
| Above - geotagged post event photos supporting the need for clean up of flood debris impacting bridges and flooded crossings | ||
| 
| 
|
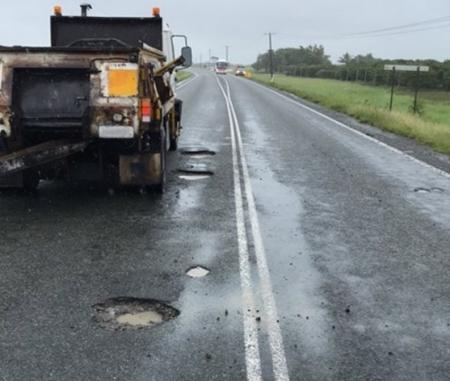
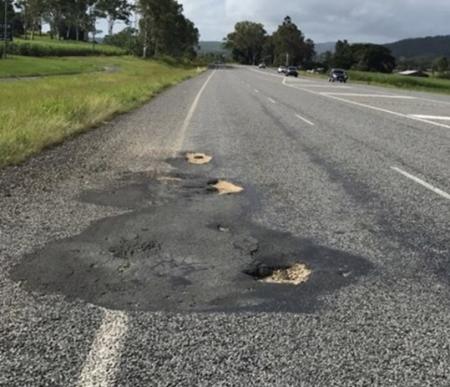
| Above – geotagged photo examples of post event pothole damage requiring emergency patching | ||
| 
| 
|
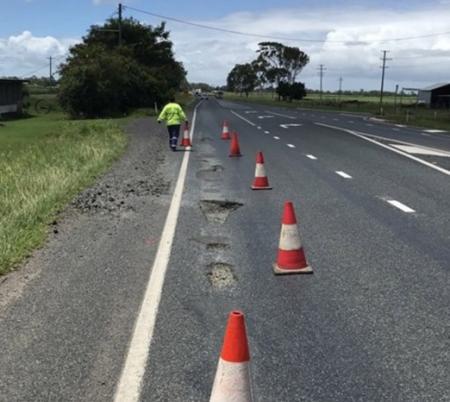
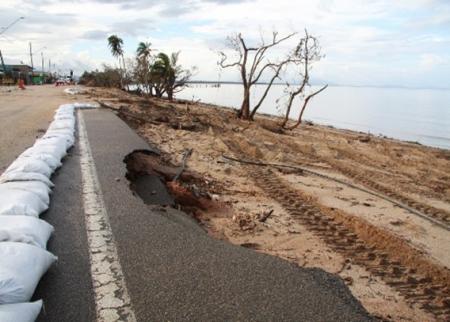
| Above - examples of post event evidence supporting the event impact on assets and the need for the emergency works | ||
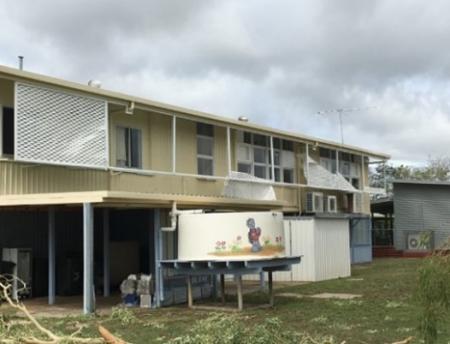
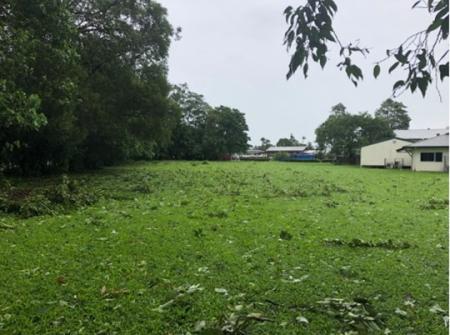
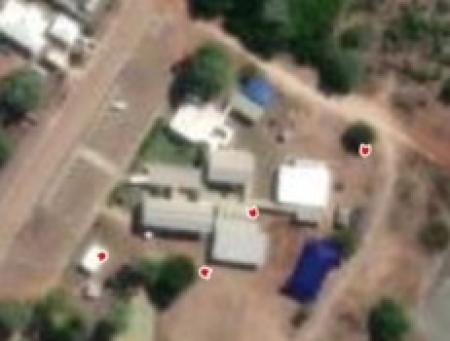
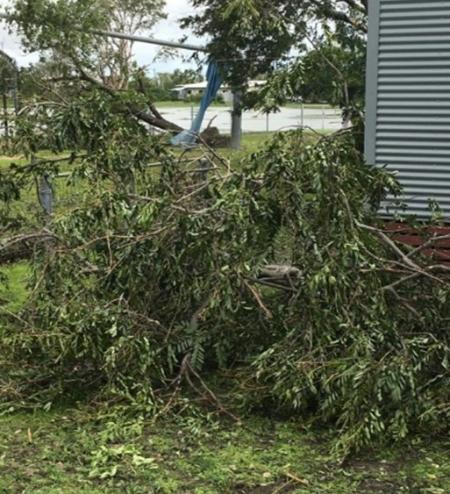
Below are three photos supporting Emergency Works on a crossing.
| 
| 
|
| 
| 
|
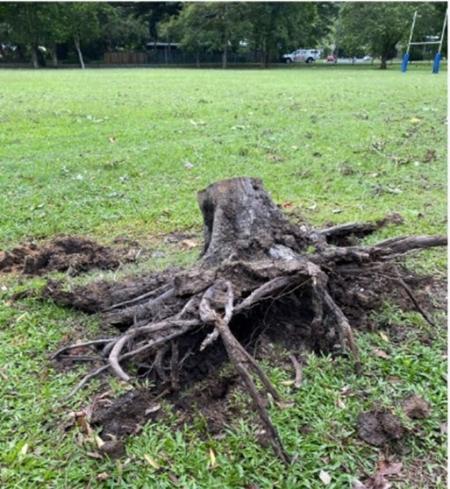
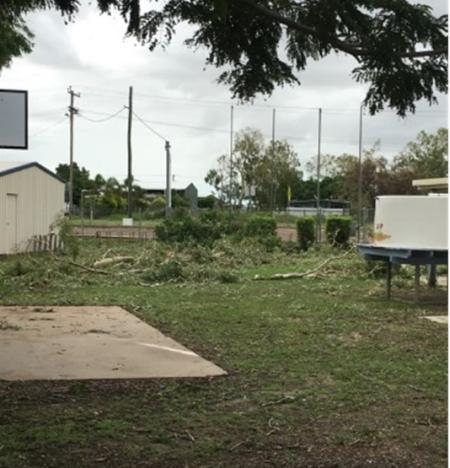
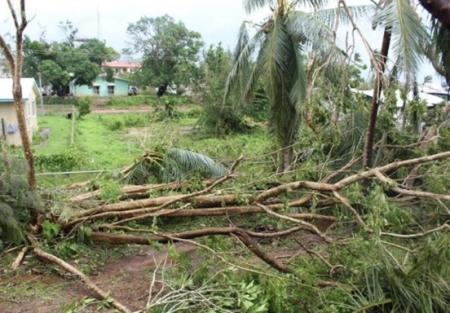
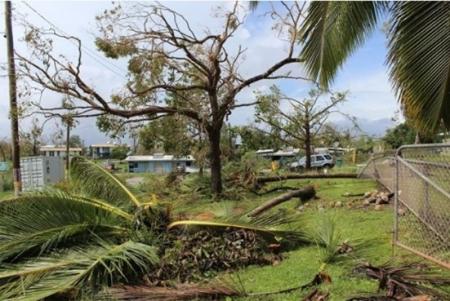
| Above - State education infrastructure - Post event geotagged photos demonstrating the location and need for emergency works to remove event related debris impacting on school infrastructure. Clean up costs not covered by insurance may be claimed under DRFA. | ||
| 
| 
|
| 
| 
|
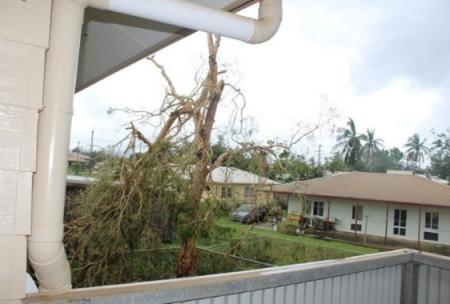
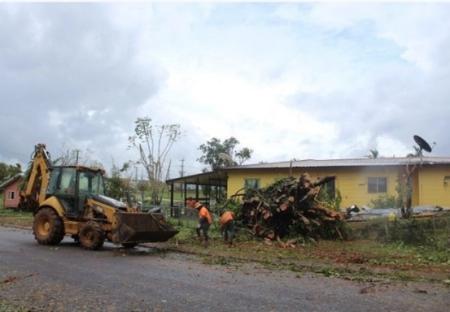
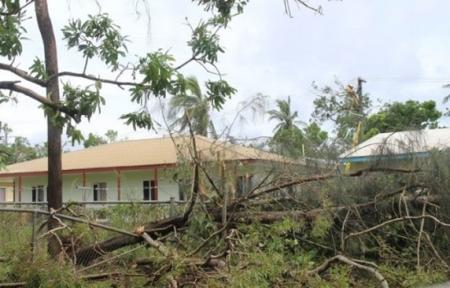
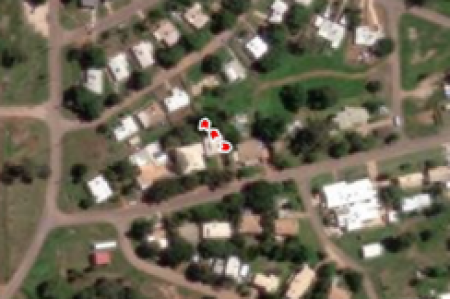
| Above State Health infrastructure - geotagged post event geotagged photo examples demonstrating the location and need for emergency works to remove event related debris impacting on health infrastructure. Clean up costs not covered by insurance may be claimed under DRFA. | ||
| |
| 
|
| 
|
| 
|
| 
|
| Detailed requirements | |
| References and tools |
|
| Need help? | Contact your QRA Regional Liaison Officer (RLO) |
Note: Where there are inconsistencies between this guidance, the Australian Government DRFA and the QDFG Guidelines, the DRFA will prevail.